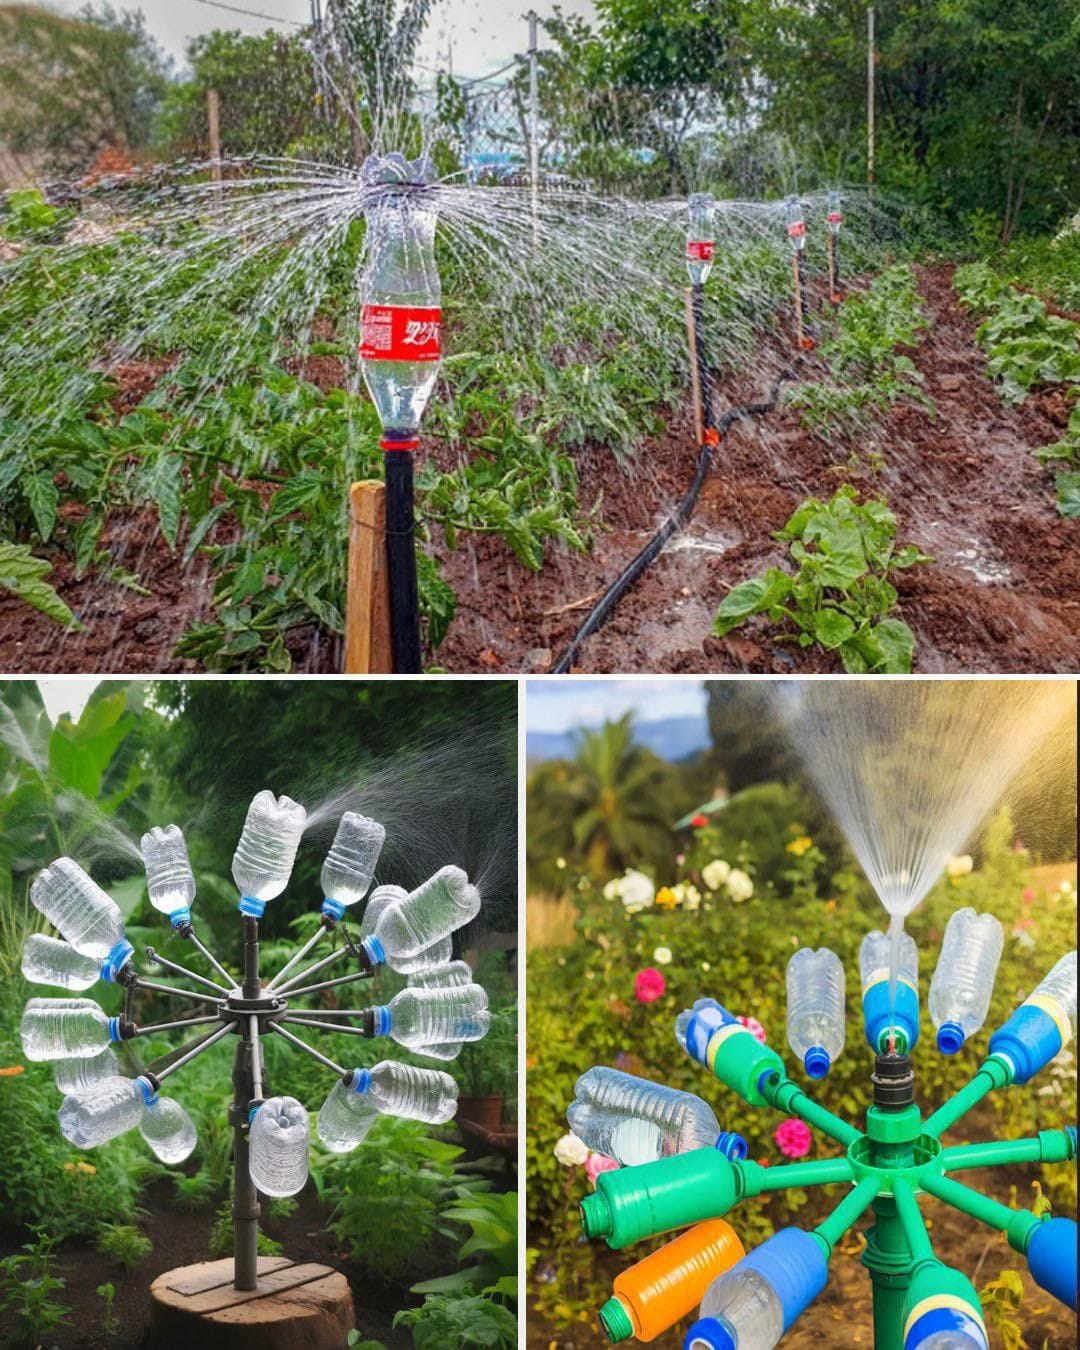
How to Make a Rotating Irrigation System Using Plastic Bottles: 10 Cents is Enough! 💧🌿
If you’re looking for a budget-friendly, DIY solution to water your garden, a rotating irrigation system made from plastic bottles is a creative and eco-friendly option. With just a few household items and a little effort, you can build a functional system that ensures even watering for your plants. Here’s how:
1. Gather Your Materials:
- Two Large Plastic Bottles: 1.5 to 2 liters each.
- Bamboo Skewer or Metal Rod: For the axle.
- Thin Tubing or Straws: To direct water flow.
- String or Thin Wire: To secure components.
- Scissors or Craft Knife: For cutting bottles.
- Awl or Nail: For punching holes.
- Hot Glue or Waterproof Adhesive: For sealing connections.
2. Prepare the Bottles:
Bottle 1: The Water Reservoir
- Clean: Wash thoroughly to remove any residue.
- Cut the Top: Remove the top portion to create an open reservoir.
Bottle 2: The Water Wheels
- Cut the Bottom: Remove the bottom of the bottle.
- Slice Lengthwise: Cut the bottle in half along its length to create two curved pieces.
3. Create the Water Wheels:
- Attach Tubing or Straws: Glue straws or thin tubing to the inside of the curved pieces.
- Purpose: These will guide water flow, creating rotational force.
- Seal Connections: Use hot glue or waterproof adhesive to ensure no leaks.
4. Assemble the Rotating System:
- Insert Skewer or Rod: Push the bamboo skewer or metal rod through the center of the water reservoir. This will act as the axle.
- Attach Water Wheels: Secure the water wheels to each side of the skewer/rod. Ensure they are balanced to allow smooth rotation.
- Secure with String or Wire: Tie the wheels firmly to prevent them from slipping or wobbling.
5. Make Water Inlet Holes:
- Use an awl or nail to punch small holes near the bottom of the water reservoir.
- Tip: The number and size of holes will determine the water flow rate.
6. Set Up the System:
- Position the System: Place the irrigation system in your garden, ensuring the reservoir is slightly elevated for gravity-fed water flow.
- Stabilize the Base: Secure the base of the reservoir so it doesn’t tip over during operation.
7. Add Water:
- Fill the reservoir with water.
- As water flows through the holes, it will move through the tubing, hit the water wheels, and rotate them, sprinkling water over the plants.
8. Maintenance Tips:
- Balance the Wheels: Check regularly to ensure the water wheels are balanced for smooth rotation.
- Adjust Water Flow: Modify the size or number of holes to control how much water is released.
- Clear Clogs: Remove debris from the straws or tubing to maintain consistent water flow.
Benefits of This DIY Rotating Irrigation System:
- Low-Cost: Uses recycled materials and costs next to nothing.
- Eco-Friendly: Reduces plastic waste and conserves water.
- Customizable: Easily adjust to fit your garden’s needs.
- Fun to Build: A creative project for adults and kids alike.
With this DIY rotating irrigation system, you’ll not only save money but also water your plants efficiently while repurposing plastic waste. 🌿 Give it a try and watch your garden thrive!
💬 Have you tried building a DIY irrigation system? Share your tips and experiences below!
#DIYIrrigation #EcoFriendlyGardening #GardeningHacks #RecyclingIdeas
