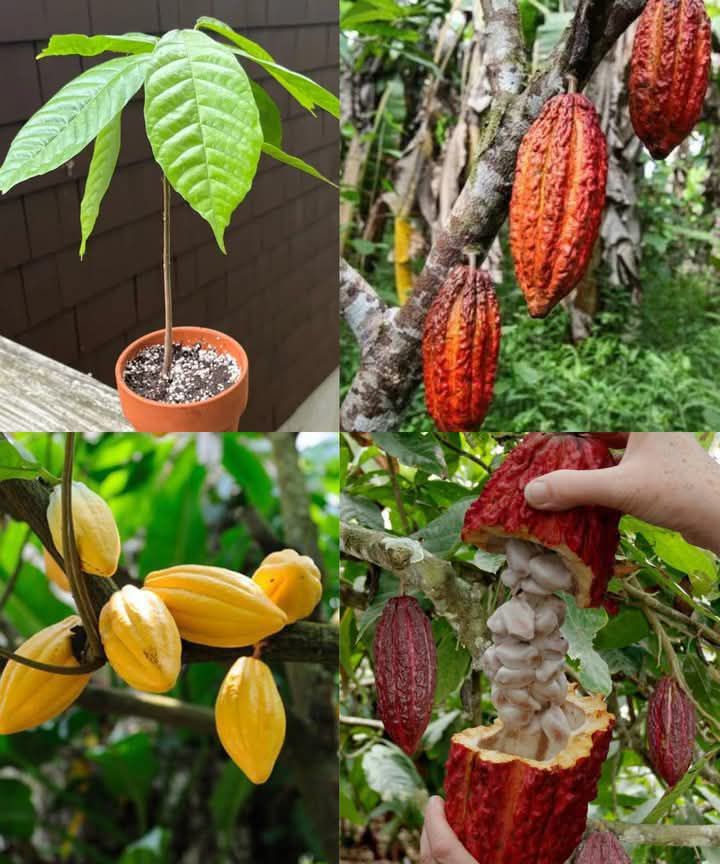
How To Grow Your Own Chocolate Tree Indoors (Even In Cold Climates)
Step 1: Choose the Right Chocolate Tree Variety
Dwarf Varieties: Opt for indoor-suitable varieties like ‘Trinitario’ or ‘Criollo’ that are compact and manageable.
Step 2: Select the Right Pot and Soil
Pot Selection: Use a pot at least 12-16 inches in diameter with good drainage.
Soil: Use a well-draining mix of peat moss, perlite, and compost.
Step 3: Create an Ideal Growing Environment
Light: Provide bright, indirect light for 12-16 hours a day.
Temperature: Maintain 65°F to 75°F (18°C to 24°C). Avoid cold drafts.
Humidity: Keep humidity high using a humidifier or a tray with water and pebbles.
Step 4: Planting and Caring for Your Tree
Planting: Add gravel at the bottom of the pot for drainage, plant the tree at the same depth as in its nursery pot, and fill with soil.
Watering: Keep soil consistently moist but not waterlogged. Allow the top inch of soil to dry between waterings.
Fertilizing: Feed with a balanced fertilizer every 4-6 weeks during spring and summer. Reduce feeding in winter.
Pruning: Prune to manage size and remove dead or damaged leaves.
Step 5: Managing Pests and Diseases
Pests: Watch for aphids, spider mites, and mealybugs. Treat with insecticidal soap or neem oil.
Diseases: Ensure good air circulation and avoid overhead watering.
Step 6: Encouraging Fruit Production
Pollination: Hand-pollinate by transferring pollen with a small brush.
Fruit Development: Be patient as it can take several years for fruit to appear.
Step 7: Harvesting Chocolate Pods
Ripeness: Harvest pods when they change color from green to yellow or orange, about 5-6 months after flowering.
Harvesting: Cut pods carefully with a sharp knife or pruning shears.
Processing: Pods need to be fermented and dried before beans can be used to make chocolate.
With the right variety and care, you can successfully grow a chocolate tree indoors, bringing a touch of tropical elegance to your home. Enjoy the process and the unique experience of growing your own chocolate!
